Free sample lesson · Crafting Laika-Style Stop-Motion Animation
Armature Mechanics
How do steel ball joints hold heavy puppet poses without slipping?
Lesson 1 of the Wondering course Crafting Laika-Style Stop-Motion Animation
What Holds a Puppet Up
A stop-motion puppet looks soft on the outside. Inside, a metal skeleton called an armature gives it structure and lets it move.
Most sturdy armatures use steel ball-and-socket joints. Each joint is tightened with screws so it can hold a pose.
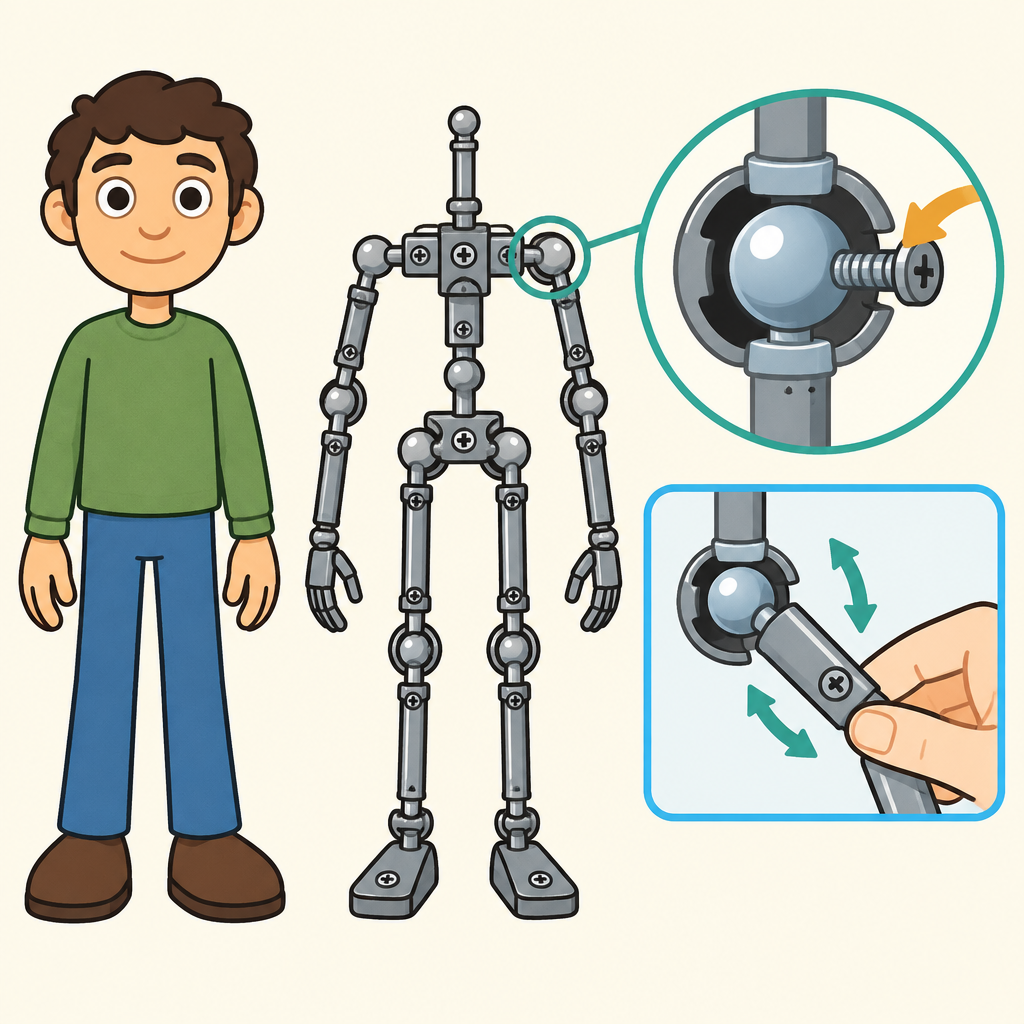
The hidden steel skeleton inside a stop-motion puppet
That answers the big question: the joints do not slip because screw pressure creates friction.
Yet that friction still allows controlled adjustment, so the animator can nudge a limb and trust it to stay there.
Inside a Ball-and-Socket Joint
Picture a steel ball held inside a socket that clamps around it. A screw tightens the socket around the ball.
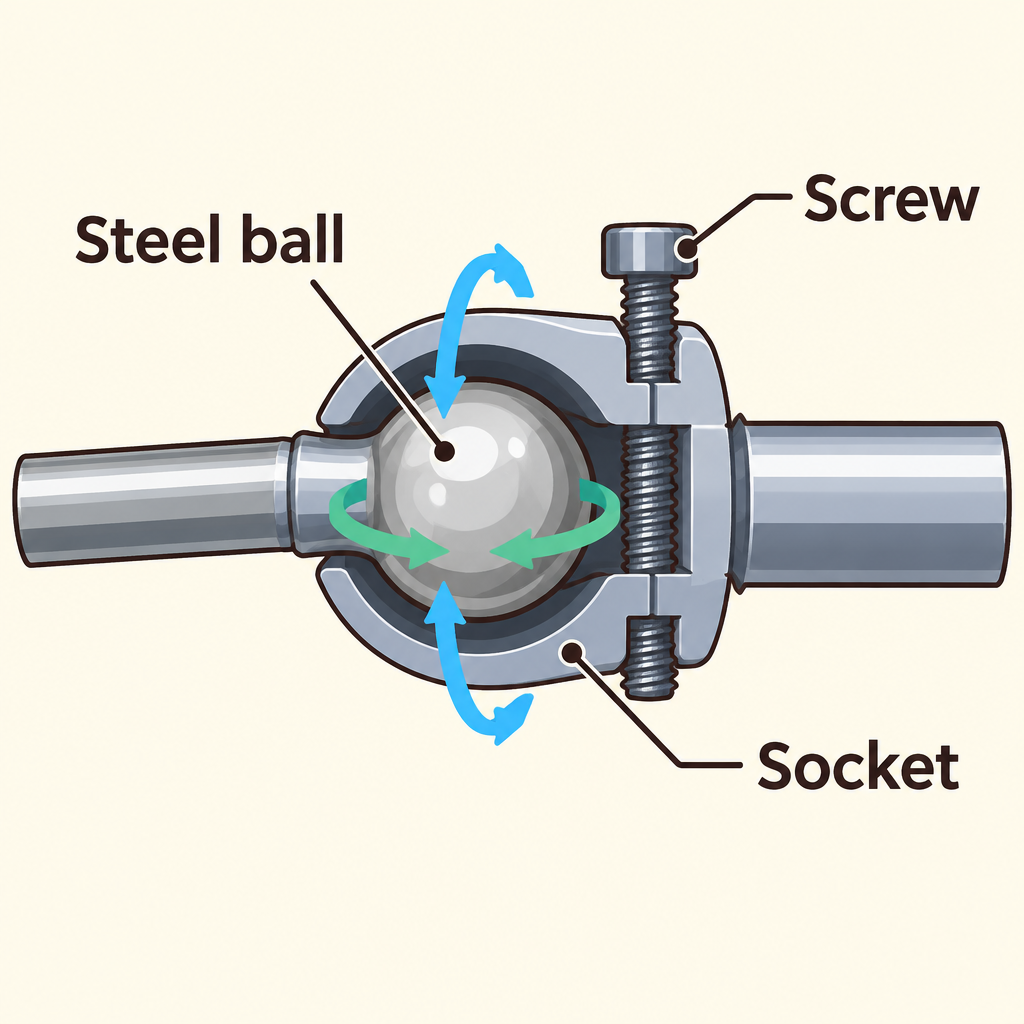
Notice how the screw squeezes the socket against the ball: that squeeze is the friction that holds the pose.
Tighten the screw, and the socket grips the ball harder.
This grip is friction. It resists turning, so the ball stays put unless an animator pushes it on purpose.
Because the ball can rotate in many directions, one joint can swing, tilt, and twist. Linked joints form a full poseable skeleton.
The Friction Sweet Spot
Every joint needs the right amount of friction. Getting it wrong in either direction ruins animation.
Too loose, and the joint sags under the puppet's weight. A raised arm slowly drops between frames.
Too stiff, and the animator has to force it. Small, careful moves become jerky jumps.
The goal is a joint firm enough to support the weight, yet easy enough to move by hand.
- Too loose
- Balanced
- Too stiff
The Skin Adds Weight
The armature never works alone. It carries the puppet's exterior, which might be foam, fabric, clay, or a molded skin.
All of that material has weight, and the joints must support it.
A covered arm pulls down harder than a bare metal limb. So joint friction is set with the finished puppet in mind.
Think of the layers: exterior on the outside, armature beneath, and the tightened joints doing the holding at the core.
- Exterior skin: Foam, fabric, clay, or a molded covering that adds weight.
- Armature: The metal skeleton that gives the puppet its structure.
- Tightened joints: Friction here holds up everything around it.
Set joint friction for the finished, fully covered puppet.
Planning the Skeleton
An armature is planned around the body areas that need to bend.
Key joint locations include the spine, neck, shoulders, elbows, hips, and knees. Each matches a place where the character must move.
Grouping them helps: the spine and neck shape the core, shoulders and elbows drive the arms, and hips and knees drive the legs.
- Armature
- Core
- Spine
- Neck
- Arms
- Shoulders
- Elbows
- Legs
- Hips
- Knees
Skip a key joint, and that part of the character cannot pose.
Anchoring the Feet
Even a perfect skeleton can wobble if it is loose on the set.
That is why armatures include strong mounting points at the feet. These let the puppet be secured to the animation set.
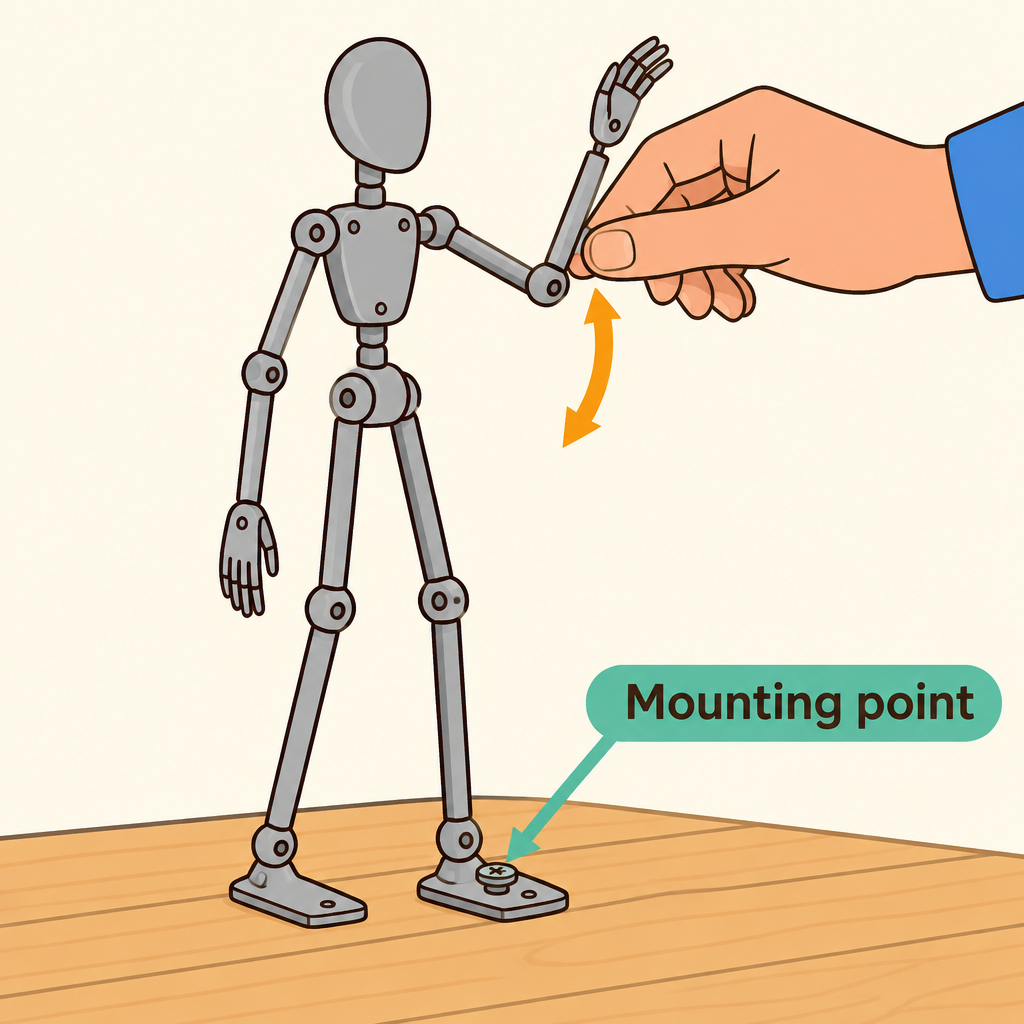
The fastened foot stays planted on the set, so moving an arm or knee changes only that joint.
A secured foot stays planted while the animator adjusts the knees, hips, or arms above it.
Without that anchor, every touch could shift the whole puppet, and the pose would drift from frame to frame.
Hundreds of Tiny Moves
Stop-motion is built from many photographed frames. Between each one, the animator makes a tiny change to the pose.
Each change must be repeatable and predictable. A joint should move the same small amount every time it is nudged.
- Nudge the joint: Make a tiny, controlled change to the pose.
- Check it holds: The joint should stay put under the puppet's weight.
- Photograph frame: Capture the pose before the next change.
Over a scene, one armature may take hundreds of small adjustments.
That repetition is why joints must hold firm, then release smoothly, again and again.
Tighter Is Not Always Better
A common belief: if joints slip, just crank every screw as tight as possible.
That fixes sagging but creates a new problem. Stiff joints fight the animator and make tiny, precise moves hard.
Each joint also carries its own share of the puppet's weight, so each needs its own setting.
Good tightening is a judgment made joint by joint.
An Armature as Infrastructure
A well-built armature behaves like reliable mechanical infrastructure. You stop thinking about it because it simply works.
It should do three things: hold its position consistently, allow predictable changes, and withstand hundreds of small adjustments.
When checking your own puppet, test each quality. If one fails, look at joint tightness, missing joints, or loose foot mounts.
Check yourself
In a stop-motion puppet, steel ball-and-socket joints are tightened with _____ to control how firmly they hold a pose.
- screws
- glue
Answer: screws
Screws tighten the socket around the ball, adding friction so the joint holds a pose while still allowing controlled adjustment.
In a puppet armature, ball-and-socket joints let the puppet _____ like a body, while strong _____ at the feet hold it steady on the animation set.
Answer: In a puppet armature, ball-and-socket joints let the puppet pose like a body, while strong mounting points at the feet hold it steady on the animation set.
Joints at body areas such as the spine, hips, and elbows provide poseability. Mounting points at the feet secure the puppet to the set so it stays in place between frames.
An animator finds that a puppet's arm slowly droops between photographed frames. What is the most likely cause?
- The elbow joint is too loose to support the arm's weight
- The elbow joint is tightened too much to move
- The feet lack mounting points on the set
- The arm's exterior is too light to stay still
Answer: The elbow joint is too loose to support the arm's weight
Each joint needs enough friction to support the weight of the puppet, including its foam, fabric, or clay exterior. A joint that is too loose cannot hold the pose, so the limb sags between frames.
Keep going
This is lesson 1 of 10 in Crafting Laika-Style Stop-Motion Animation. Next up:
- Foam Casting
- Facial Replacement
- Magnetic Registration
- Scale Environments
- Tie-Down Rigs
Wondering turns any topic into short lessons you can read, watch, or listen to, with practice questions and an AI tutor.